
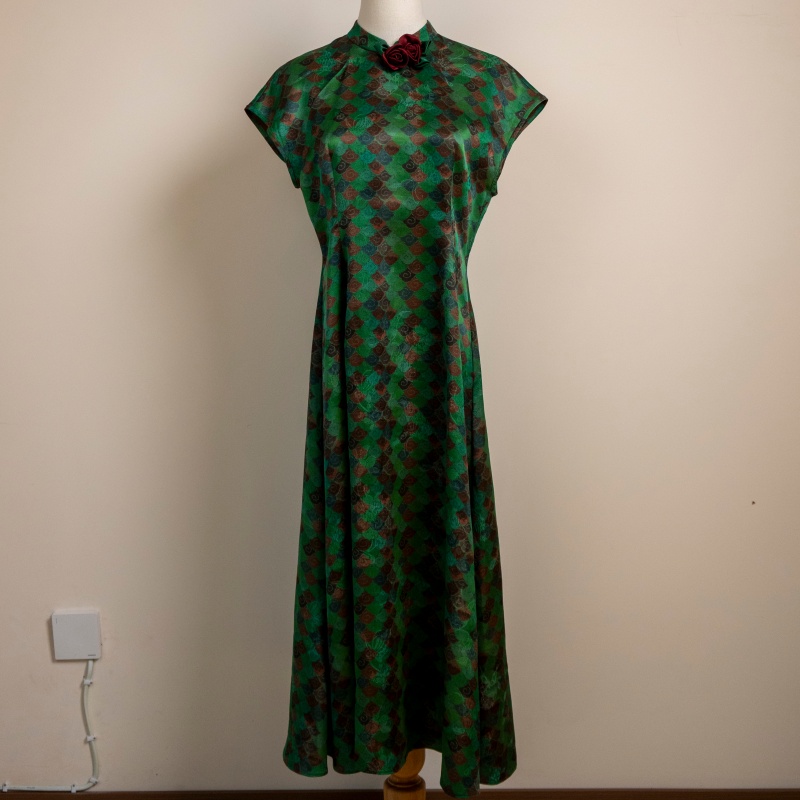
Key points for hanging and drying silk cheongsam to prevent deformation
How to Hang Dry Your Silk Cheongsam Without Warping the Shape
Hanging a wet silk cheongsam sounds like the easiest thing in the world. Grab a hanger, drape it over, walk away. But that simplicity is exactly why so many cheongsam end up stretched out, misshapen, and ruined after a wash. Wet silk does not behave like wet cotton. It stretches under its own weight. It sags where beads pull it down. It deforms at every point where a hanger or clip creates pressure. By the time it dries, the silhouette is gone and no amount of ironing brings it back.
Hanging can work for silk cheongsam, but only if you do it the right way. Every detail matters — the hanger, the clips, the height, the airflow, the timing. Get one thing wrong and the whole garment pays the price.
What Actually Happens to Silk Cheongsam When You Hang It Wet
Gravity Is the Enemy
Wet silk fibers swell and lose their structural rigidity. A dry silk cheongsam holds its shape because the fibers are tight and resistant. A wet one? It behaves more like a heavy curtain. Gravity pulls every wet section downward, and the fabric elongates at the stress points.
The shoulders take the most abuse. A hanger concentrates the entire weight of the wet garment on two narrow points. Within a few hours, those points have stretched permanently. The shoulder seams drop. The collar pulls away from the neckline. The whole upper body of the cheongsam sags like it has been worn a hundred times.
The hem stretches too. Water adds significant weight — a soaked silk cheongsam can weigh two to three times more than a dry one. That extra weight pulls the hem downward unevenly, especially if the hanger is not perfectly centered. The result is a longer, wider, shapeless garment that does not fit the way it used to.
Beads and Embroidery Make It Worse
If your cheongsam has beadwork or heavy embroidery, hanging it wet is almost guaranteed to cause damage. Beads are dense. When the fabric is wet and soft, those beads sink into the silk and pull the surrounding fabric downward. Over several hours, this creates permanent sagging around every beaded area — the collar, the front opening, the side slits.
Embroidery threads are often thicker than the base silk. They absorb water at a different rate and dry at a different rate. This mismatch creates tension between the embroidered sections and the plain fabric. The embroidery pulls tight, the surrounding silk puckers, and the whole surface becomes uneven.
The Right Hanger and How to Use It
Ditch the Wire Hanger Immediately
A thin wire hanger is the worst possible choice for drying a silk cheongsam. The wire is narrow, so it concentrates all the weight on a tiny line. That line cuts into the shoulder fabric and leaves permanent creases. Even after the cheongsam dries, you will see two parallel indentation marks running from the collar to the shoulder edge. Those marks never fully come out.
Wire hangers also have no padding. The metal transfers any temperature change directly to the fabric. A cold wire hanger in a cool room causes the silk to stiffen unevenly. A warm wire hanger near a vent warps the fibers. Neither scenario is good.
What to Use Instead
A wide, padded hanger covered in cotton or velvet is the minimum requirement. The padding should be at least two centimeters thick and should extend past the shoulder width of the cheongsam by a few centimeters on each side. This distributes the weight of the wet garment across a broad area instead of two narrow points.
If you do not own a padded hanger, you can make one. Take a regular hanger and wrap it completely in a clean cotton cloth. Secure the cloth with tape so it does not slip. It is not as good as a proper padded hanger, but it is infinitely better than bare wire.
The hanger width must match the cheongsam shoulder width exactly. A hanger that is too narrow will still create shoulder stretch. A hanger that is too wide will push the fabric outward at the shoulders and create bumps that distort the silhouette.
Clip the Hanger to the Side Seams, Never the Shoulders
This is the detail that most people get wrong. They slide the hanger under the shoulder seams because it looks natural. But that is exactly where the damage happens.
Clip the hanger to the side seams instead. Use clothespins or padded clips attached to the hanger arms at the side seam points, about five centimeters below the armpit. This takes the weight off the shoulders entirely and lets the cheongsam hang from its strongest structural points — the seams.
When you clip at the side seams, the shoulders stay flat. The collar stays aligned. The silhouette holds its shape while the water drains. It is a small change that makes an enormous difference.
Setting Up the Hanging Position Correctly
Height Matters More Than You Think
The cheongsam should hang high enough that the hem does not touch any surface. If the hem brushes against a bed, a chair, or the floor, that contact point will create a crease that dries into a permanent line. Raise the hanger so there is at least thirty centimeters of clearance below the hem.
Do not hang the cheongsam too high either. If it hangs from a rod near the ceiling, the fabric may sway in air currents, causing uneven drying and shape distortion. The ideal height is just below a curtain rod or a closet rod — high enough for full clearance, low enough to stay still.
Airflow Direction and Placement
The cheongsam needs airflow to dry, but not direct airflow. A fan blowing straight at the hanging garment will dry one side faster than the other, causing uneven shrinkage and stiffness. Position the cheongsam in a spot with gentle, indirect airflow — near an open window with a sheer curtain, or in a hallway with natural air movement.
Never hang a wet cheongsam in a bathroom with an exhaust fan running directly on it. The concentrated airflow will dry the edges fast while the center stays wet, creating a stiff outer shell with a damp interior. That combination leads to mildew inside the garment within days.
Distance From Walls and Other Clothes
Leave at least ten centimeters of space between the cheongsam and any wall or other garment. Touching a wall traps moisture against the fabric and slows drying on that side. Touching another garment risks color transfer, especially if the other piece is dark-colored and still slightly damp.
The Critical Timing: When to Hang and When Not To
Do Not Hang a Soaking Wet Cheongsam
This is the single biggest mistake. A fully soaking wet cheongsam should never go on a hanger. The water weight is too great. The fibers are too soft. The stretch will be immediate and permanent.
Wait until the cheongsam has drained most of its water. After the towel-roll step, when the fabric feels heavy but not dripping, that is the earliest you should consider hanging. Even then, use the side-seam clip method and do not expect it to dry quickly.
The Best Window for Hanging
The ideal time to move from flat drying to hanging is when the cheongsam is about 70 to 80 percent dry. At this point, the fabric has enough structure to resist stretching, but it still needs airflow to finish drying. The hem will not sag as badly. The shoulders will hold their shape. The embroidery and beading will not pull the fabric out of alignment.
If you are unsure whether it is dry enough, lift the cheongsam by one side seam. If the fabric drapes straight down without bunching or sagging at the bottom, it is ready to hang. If the bottom curls or folds under its own weight, it needs more flat drying time.
Protecting Shape While It Hangs
Supporting Heavy Areas From Below
If your cheongsam has beaded sections along the collar or front opening, place a rolled towel underneath those areas before hanging. The rolled towel provides gentle upward support so the beads do not pull the fabric downward. It is not a hard surface — just enough lift to counteract the bead weight.
Remove the rolled towel once the cheongsam reaches 80 percent dryness. Leaving it on too long traps heat and slows drying in those areas, which invites mildew on the threads.
Turning It Inside Out Mid-Dry
About halfway through the hanging dry, flip the cheongsam so the inner lining faces out. The outer surface carries the dye and the sheen. Prolonged exposure to even filtered light during the final drying stage can cause subtle fading. The lining side is more forgiving.
Flip it gently by unclipping and re-clipping the hanger. Do not pull it over the hanger — that stretches the neckline. Unclip both sides, rotate the cheongsam 180 degrees, and re-clip. It takes ten seconds and protects the outer color.
How to Know It Is Dry Enough to Take Down
Touch the lining, not the surface. The lining dries last because it sits against the body of the fabric and traps moisture. If the lining feels even slightly cool or damp, the cheongsam is not ready.
A cheongsam that is not fully dry should stay hanging. Do not fold it. Do not store it. Do not put it back on a padded hanger in the closet. Keep it hanging in the shade until every inch is completely dry. That final check takes thirty seconds and prevents months of mildew damage.
When it is fully dry, the silk should feel cool, smooth, and soft. If it feels stiff or slightly rough in any area, that section dried too fast or under uneven conditions. A light vinegar mist followed by gentle steaming can restore the hand feel, but preventing the problem in the first place is always the better move.
Hanging a silk cheongsam the right way takes more effort than most people expect. But the alternative — a stretched, misshapen garment that no longer fits — is far worse. The hanger, the clips, the timing, the airflow. Every detail exists for a reason. Respect the fabric and it will keep its shape for years.